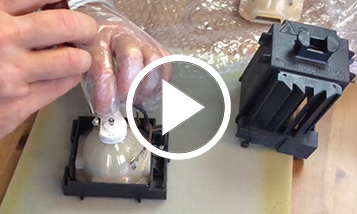
Instruktionsfilm om byte av endast glödlampa i lampmodul
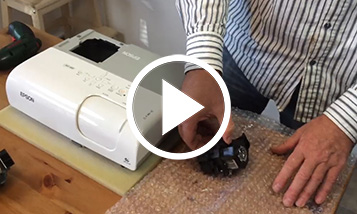
I filmexemplet ser du ett byte av endast glödlampan i den ursprungliga lampans lampmodul. Bytet visas med lampan POA-LMP108 som används för vissa Sanyo- och EIKI-projektorer. Tillvägagångssättet för andra lampor är liknande, men skiljer sig i sättet hur lampmodulen monteras ihop och hur kontakter ansluts. I exemplet är alla kontakter fastsatta med skruv och det är verkligen enkelt att byta endast lampan. Om någon av kontakterna skulle sitta fast vid glödlampan är det nödvändigt att använda en elögla eller ett hålrum för att ansluta den. I dessa fall rekommenderar vi att själva lampan byts av en specialist.
Transkription av undertexter
- Open the cover of your original module
- Method of attachment of the cover may slightly differ for different lamps.
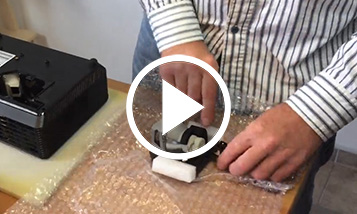
- Remember well the attachment of the original bulb and power cables
- We recommend taking a photo of the original wiring
- Wear gloves
- Never touch the bulb with bare hand
- You can use e.g. gloves from gas station
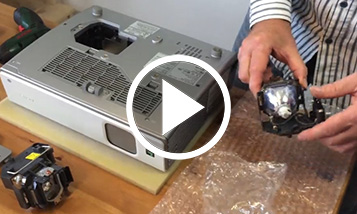
- Unpack the new bulb
- Make sure that the bulb shape corresponds to the original one
- Designation of the bulb may not always be the same; it may be a bulb with the same parameters from another qualified manufacturer
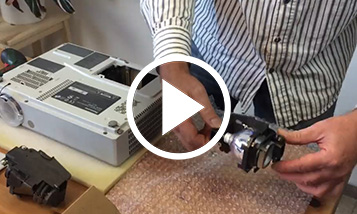
- Remove the old bulb
- Disconnect and release the original bulb
- If some connector is securely bolted, you must use a metal eyelet that we can send you on request
- Install the new bulb
- Always attach the connectors to the same location as they were before
- Most modules use two connectors only, do not confuse even those (it may be a DC bulb)
- Cover the lamp module
- Do not forget to reset the counter after settling the lamp module into the projector
- Follow the instructions in your projector manual,
- or check out our other videos.